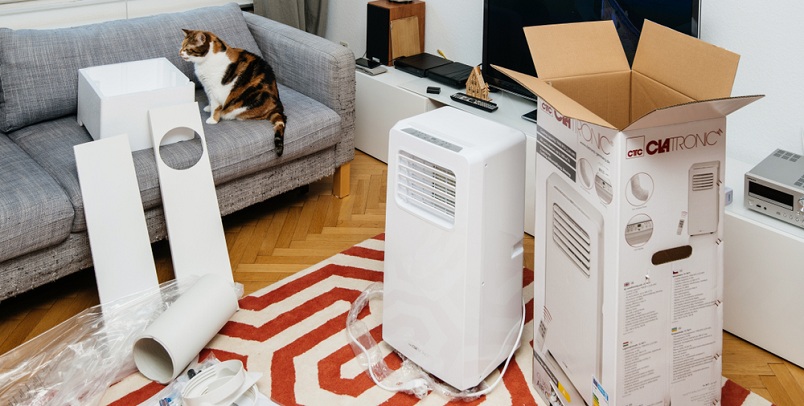
Most portable air conditioner units are easy to install. You can do it in less than 30 minutes if you have all the components, including hoses and window attachments.
This guide is a detailed step-by-step overview of installing a portable air conditioner in your room, along with answers to frequently asked questions.
The most important aspects of installing a portable air conditioner are ventilation and drainage.
Exhausting the hot air from your room to the outdoors is the best way to ventilate your room. We’ll show you how to eliminate the stink by using a fan and explaining your alternatives when window ventilating isn’t possible.
Drainage is the second critical thing to get right when growing a garden. We explain how to drain evaporator coils and manual drain ACs correctly.
Best Portable ACs of 2022
Check out our top picks for every type of room and price range – with reviews, pros & cons, buying tips & more.
Basic Safety Tips
Before you set up a portable air conditioner, there are several important safety tips you need to be aware of.
Read the instructions before starting. This guide is not a substitute for your product manual. First, check the manufacturer’s installation and use instructions.
Portable air conditioners are heavy. Be careful! Do not attempt to lift one on your own because it could cause serious injury to you. Check whether it has casters if you move it on a flat surface. If that’s the case, you just need to push it gently.
Don’t use a power strip or power extension for an AC. Portable air conditioners draw a lot of power whenever they kick on. Only connect it to a grounded electrical socket.
Keep kids away from the unit. Don’t let them play around, hang, or sit on it. It could fall off and break or cause serious injury.
Ensure you only plug it in after you’ve finished the installation. Especially your exhaust and drain hosing – ensure that they’re air- and water-tight and that all sealants are cured.
Before using a portable air conditioner, ensure the included air filter has been installed properly. Flying debris can damage the unit if not. Keep your air purifier clean and change the filter when instructed by the manufacturer.
Don’t attempt to fix a portable air conditioner yourself. Take it to an HVAC technician or contact the manufacturer for help.
Where To Set A Portable AC
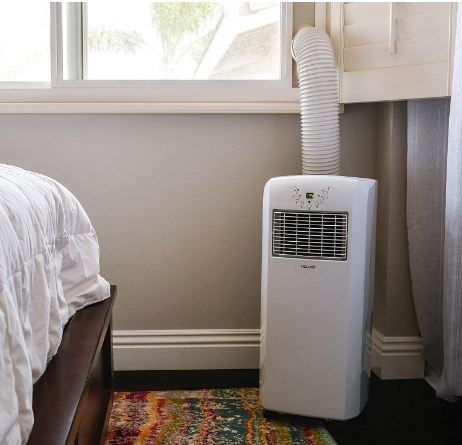
Portable air conditioners should always be placed on hard floors at least 8-12 inches away from furniture and plants. Check the manual for the minimum clearances between the wall and the equipment.
Never place an air conditioner on a desk, chair, or shelf. These devices are meant for operation on the floor.
Ideally, a portable AC unit should be placed near an outdoor window and an electrical socket. Ensure the power cable can fit into the outlet without stretching it. Ensure the vent hose can fit through the window without overstretching it.
Manufacturers usually recommend keeping the hose as short and as straight as possible. When your air conditioner is positioned correctly, you’re ready to install it.
Check the components in this box against the list in this manual. Make sure that everything has been included.
A typical window kit includes the following:
- a vent hose
- vent hose adapters
- a window slide connector.
Some kits may also come with screws and weatherstrips or foam.
If something is missing, contact the merchant immediately.
Venting the Exhaust Correctly
The most common way of venting the hot air from a portable air conditioner is through a window outside. If you don’t have an external window in your room or can’t use one, read the next section instead.
Venting windows is quite simple if you have the right tools. All you need is a few parts.
Step 1: Install the adjustable window kit
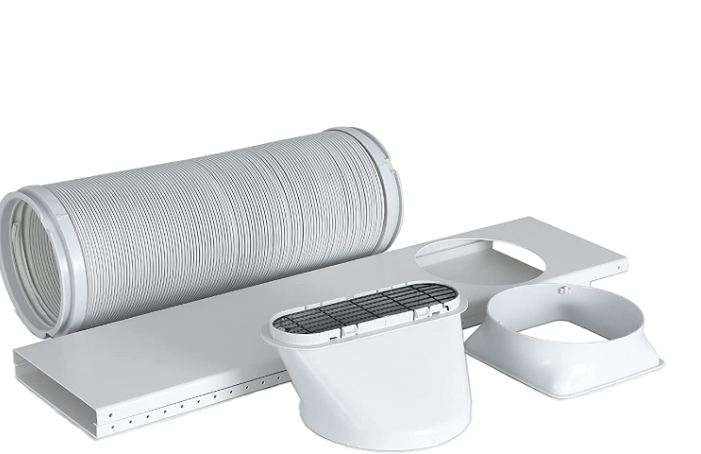
Window kits work with most windows, including those that slide to the side and up and down.
If your window has a traditional up-down operation, place the kit at the bottom and extend it until it fills the width of the window opening.
If your window slides side-to-side, place the kit on one side and extend it until it fills the window’s height.
If your window opening is smaller than the minimum length of the slider kit, you’ll have to trim the kit down.
If your window opening is larger than the maximum length of the slider kit, then you can use plywood, Plexiglas, or cardboard to fill the gap. You can also buy the filler material at local hardware or home improvement store and have it cut to the precise dimensions you need.
After you fit the window kit properly (no air should leak, and no sunlight should be visible), close the window to hold the slider kit in place.
Some kits come with weather strips or foam between the slider and the window to prevent insects and warm air from getting in. Your kit may also have screws that you need to use to hold the kit more securely in place.
If you want, you can buy a separate security lock to ensure the window cannot be opened from the outside.
Step 2: Attach the hose
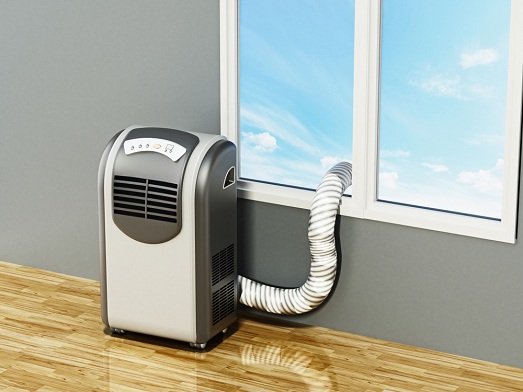
Attach the vent hose to the AC’s return air vent. Check whether there is an electrical outlet already in place on the wall. If there isn’t a connector for the hose, then install the connector before attaching the hose.
At the other end, connect the window exhaust (or vent) connector, which is usually included in the window vent kit. Extend the hose until you connect it to the slider kit. Make sure it securely holds in place.
To ensure that your exhaust hose is as linear and direct (as short) as possible, you’ll want to avoid restricting airflow by keeping the exhaust hose as close to the window as possible.
Some manufacturers also suggest extending the hose no further than nine feet. The shorter and straiter the exhaust hose, the easier it is to clean.
Step 3: Plug in the AC
It’s now time to plug in your AC unit.
We mention in our safety tips that you should only use a properly grounded electrical outlet and never connect the air conditioner to a power strip or extension cord.
Most outlets have an indicator light when connected to an electrical source. The plug should include two buttons labeled ‘Reset’ and ‘Test.’
Click the TEST button. This turns on the built-in safety features that cut off current if they detect something wrong with the power supply. The indicator light and the unit should turn off. Press the RESET button to re-connect the AC.
If you’re using these buttons to turn your air conditioner on or off, don’t use them. They’re meant only for periodic testing and to turn the air conditioner on if power has been lost. Refer to your manual to see exactly how to connect the air conditioner to an electrical outlet.
Once you’ve pressed RESET, your AC is ready to go.
Read the manual for instructions on how temperature and humidity levels are controlled. Most units come with a remote control which you’ll have to learn.
Venting Without a Window
Venting your windows is easy and convenient.
But this doesn’t necessarily mean that you cannot enjoy your air conditioning if you don’t have windows or cannot use the one you have.
Here are some other options:
Vent through a sliding door
If you cannot vent outside, the next best place to vent is through a sliding door.
Installing the vent is pretty much similar to window venting.
You can use the exact same window slider kit. However, you’ll need a filler to fill the gap that isn’t covered by the slider. If you want to slide doors, get a special slider kit. It will fill up most of the door height. You don’t need to use any fillers.
Venting through a sliding door has its challenges. Can you still open it? Security is always an issue.
Here’s a video that provides some good suggestions.
Vent through the ceiling
If the portable air conditioner is for an office, you may be unable to vent through the window because of the building’s design. A drop ceiling is an excellent alternative.
You’ll need a specialized drop ceiling venting kit. You may also need the help of an air conditioning technician. It’s also essential to speak to the building manager if there are any safety or quality issues regarding drop ceiling ventilation.
Vent through an exterior wall
If you’re in a windowless room and there’s no way to get outside, you can use the vent hose to get out. You’ll need a pro to cut the right size hole in the wall for the vent hose.
Vent through the chimney
If you don’t have a chimney, you can install the vent hoses anywhere else. Make sure there isn’t any soot in the chimney, and the flues are open.
Preventing Water Leakage

Leakage is one of the most common complaints I hear from portable AC users.
When warm air is made cooler, moisture is removed from the air. Water must then be removed from the air over time. If you don’t set up a good system for cleaning the unit, it will leave a puddle on your floor.
Most portable air conditioners leak because they don’t seal the drain hose properly or because there is too much humidity inside the room that overwhelms the drainage capacity of the unit (or drip pan)
Know whether your portable air conditioner is self-evaporating or requires manual draining. Each type uses a different system to keep your home cool.
Self-evaporating portable ACs exhaust hot air out through the exhaust hose. You don’t need to drain them most of the time.
However, if too much humidity is in the air, the condensation will accumulate in the AC and build up in the emergency panel, usually near the drain hole.
Some units have an indicator, usually ‘FL’, to let you know when the emergency drain pan has filled up.
You’re then supposed to either place the air conditioner over a drain or connect an external drain hose. If you close the drain plug with a cover, consider using one.
There’s no indicator, so just keep an eye on where the floor is. If you notice any leakage, it’s time for you to drain it. If you’ve capped the drain plug, then you’ll know when the water collector has reached capacity because the unit won’t be able to function anymore.
Unlike evaporative cooling units, manual drain air conditioners drop water vapor into a drain pan (traps), which need to be emptied; otherwise, they will eventually overflow.
You will need a manual way to empty the water from the unit’s tank or install a separate drain line to send the water out.
Frequently Asked Questions About Installing a Portable Air Conditioner
Do all portable air conditioners need to be vented outside?
Yes, in general. Most do need to vent outside, but not in all situations
If the unit uses a manual drain, you don’t need to vent the AC’s exhaust air outside if all you need is to dehumidify a room or in fan-only mode.
Most fans don’t need to be vented unless they’re used in fan-only modes.
But whenever the air conditioning is needed, a portable AC must be vented outside in some way. If not, the warm exhaust air blowing back into the room will defeat the purpose of having an air conditioner.
Always check the manual to see what the manufacturers recommend.
What size portable air conditioner do I need for my room?
Portable air conditioners are measured in BTUs.
If your room measures 300 square meters, an air conditioner with a capacity of 6,000 BTUs will be sufficient.
Before buying an air conditioner, check the room size requirements. Manufacturers will often tell you the maximum size of the space you can use their product in.
Do portable air conditioners need a water supply?
No. Portable air conditioners do not require water. They’re not humidifiers. They produce water as their system dries out the air in the room.
Can you vent a portable air conditioner through a dryer vent?
Most of the time, no. The manufacturer may specifically tell you not to do that.
The reason is that dryer vents and air conditioning exhaust hoses are usually not the same size. Other dangers associated with using a dryer vent besides lint blowing back into your unit include fires.
First, contact an HVAC technician for advice if you need to install a dryer vent.
How can I cool a room with no windows?
You can vent through any type of wall, including a drop ceiling or exterior.
I’m a degreed ME (mechanical engineer) who is passionate about machines of all kinds. I created MachineWonders.com as a way to connect with others who love machines like me – or need help choosing one for their needs, application, or situation.

